How to Abrade the Transducer
- Only abrade the transducer once housed in the sensor body.
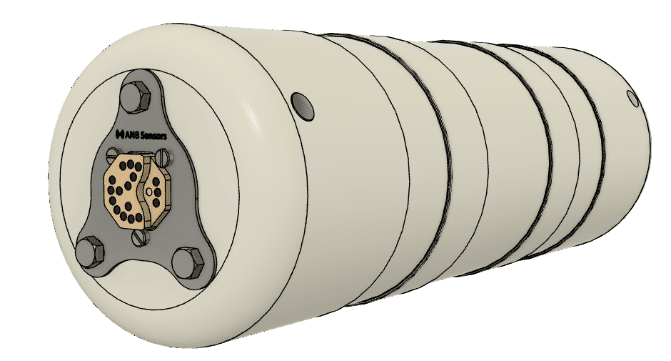
- Abrade the top surface of the transducer – the higher part with 14 black dots – using the abrasion block supplied.
- Be cautious to ensure the abrasion block remains horizontal to the surface.
How to Replace the Transducer
- Only remove the transducer if informed to do so by the program on Tera Term.
- The software will inform you to do this at one of two times: after data collection, or in the pre-deployment scan check.
Always ensure the sensor is dry before removing the transducer
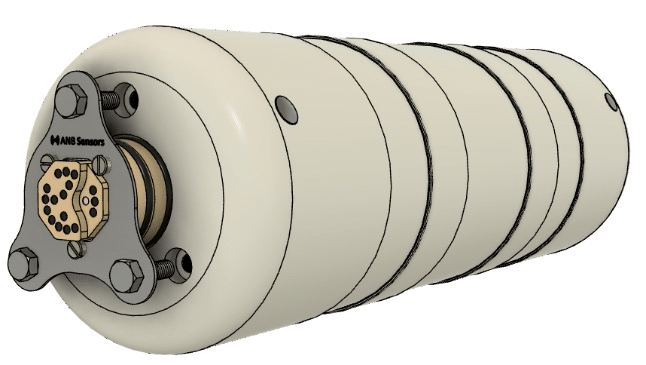
- Using the spanner unscrew the three large bolts in the titanium plate until they begin to spin freely.
- Pull on the titanium plate to remove the array from the body as illustrated below.
- Using the supplied towel, dry the cavity formed by the missing transducer.


Important note: the transducer can only be inserted in one orientation – if solid resistance is felt in the early stage ensure rotation is correct.
- Take the replacement transducer complete with plate, bolts, and nuts from the case or from a newly ordered part.
- To ensure you always possess a working transducer we recommend you purchase a new spare transducer at this point as they can have up to 8-week lead times.
- Apply silicone grease to the perimeter of the O-rings ensuring a thin and even covering.
- Using the three large bolts as a guide locate the correct rotation.
- If correct location is found the transducer should freely fall into the cavity until the lower O-ring.
- With minimal force, press the transducer in until the bolts contact the sensor body.
- Using the provided 8mm spanner tighten the bolts until the transducer is flush with the sensor body. Each bolt should be tightened incrementally.
- If the transducer is not flush with the body, you will not get any data and may damage the lifetime of the array.
Please do not hesitate to contact us at support@anbsensors.com if you have any questions.