Operating the Sensor
Select your com port and the sensor details (at time of power up) will load.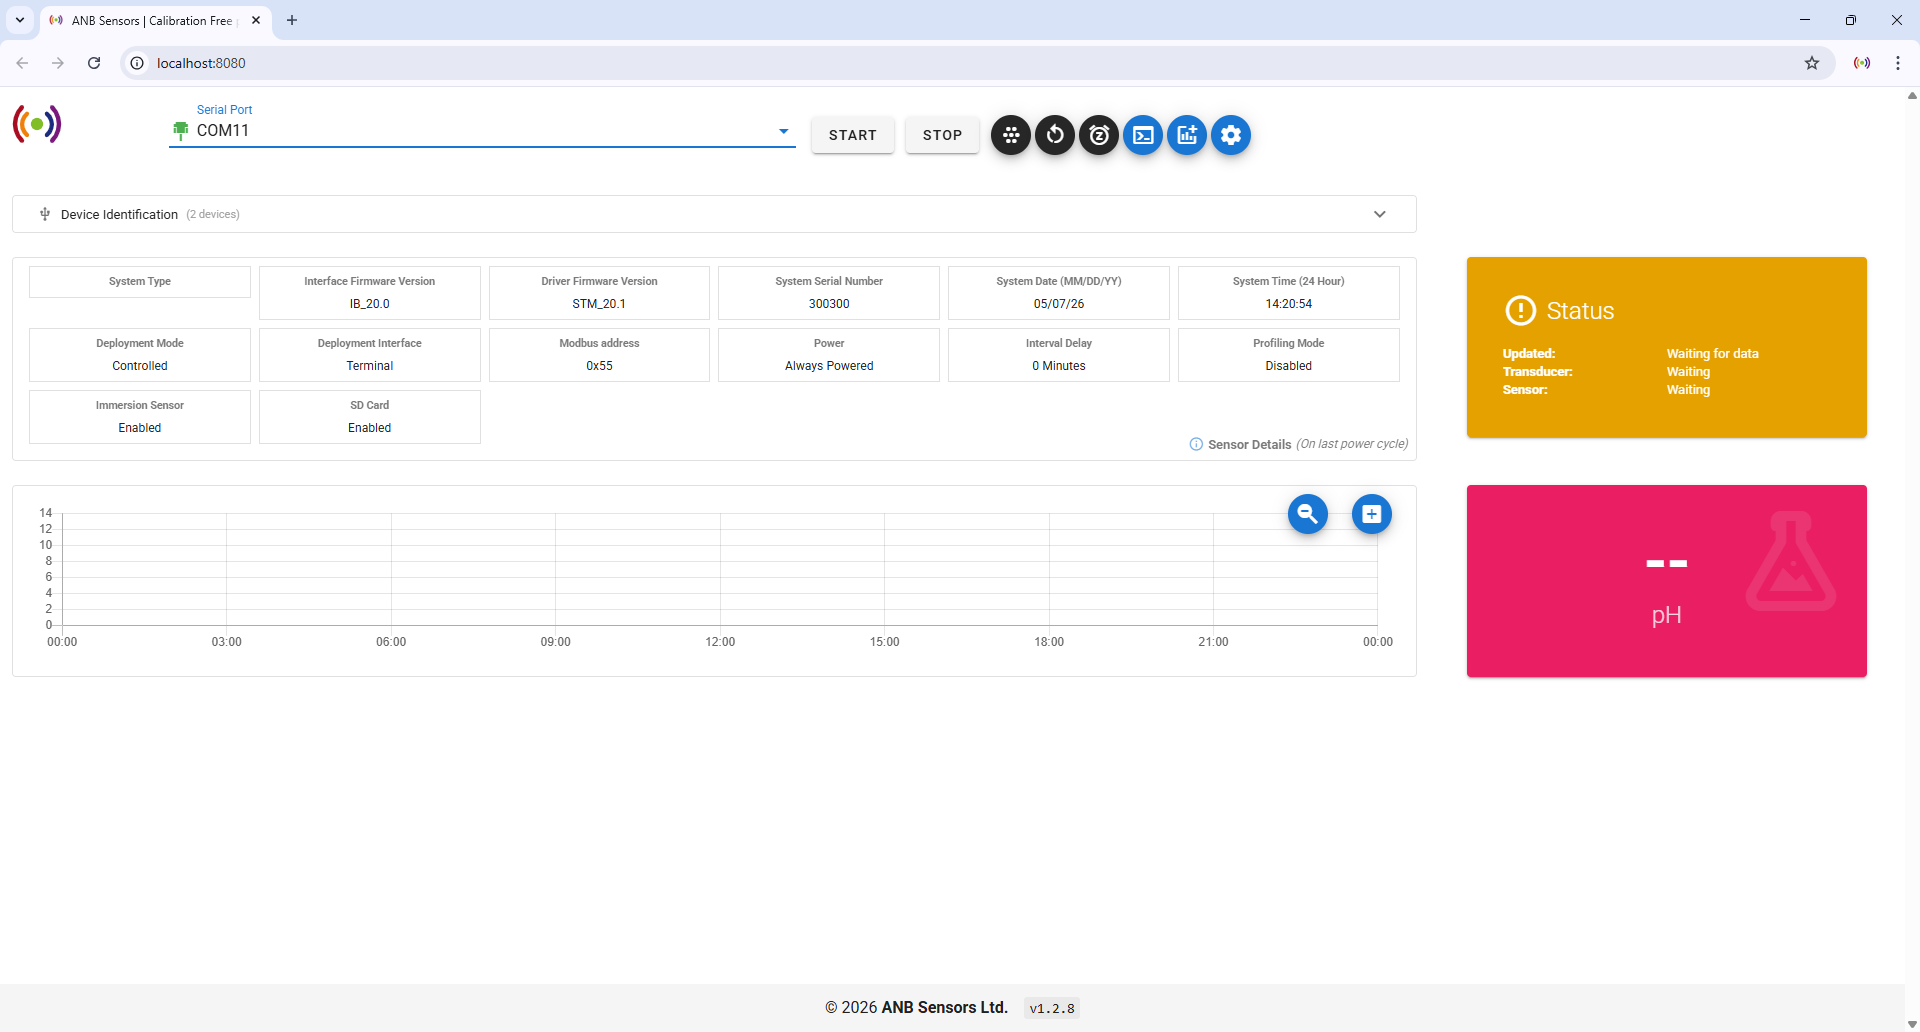
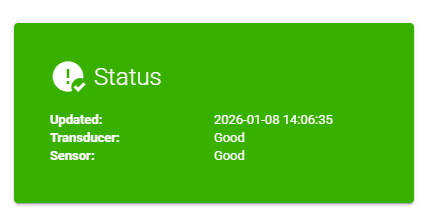
The current status of the sensor and transducer is given in the STATUS box. This shows green if all is well and red if action is required. Note: this updates when the sensor is scanning.
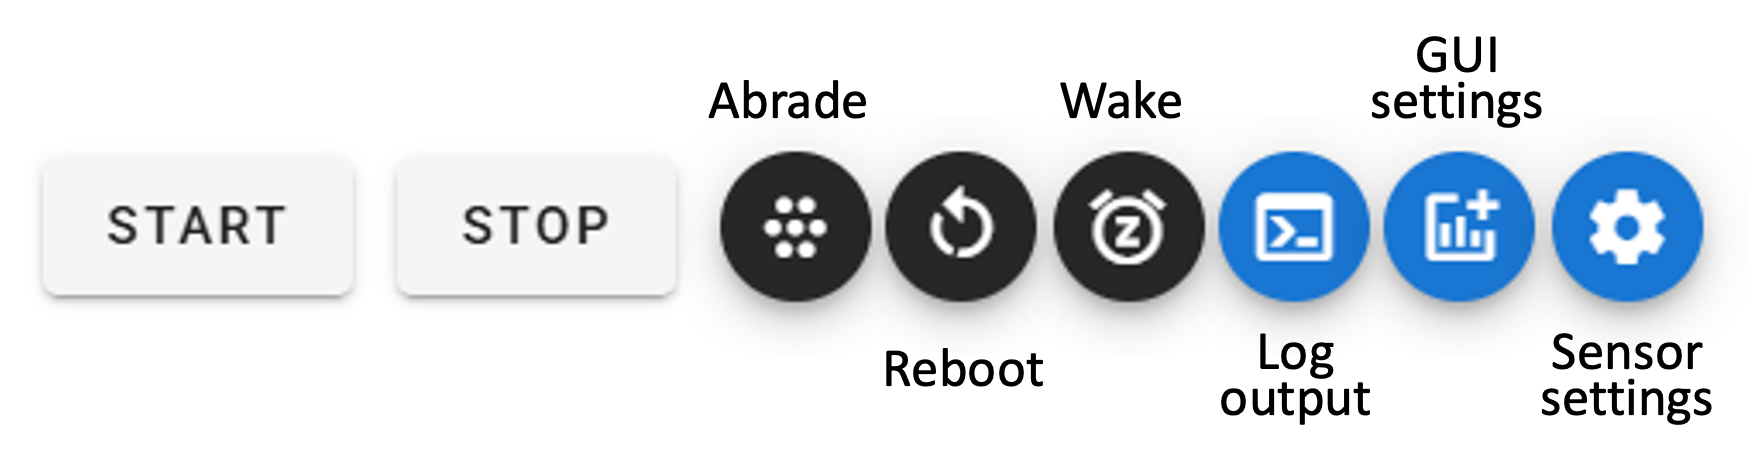
Start
Allow the sensor to run for approximately 30 minutes to reach measurement stabilisation to ensure accurate measurements. If you are updating or redeploying a legacy sensor, the stabilisation period may exceed 30 minutes.
Stop
⚡ If the sensor is configured with an interval delay, it will require a Wake to re-enable communication.
Abrade command
Press abrade to tell the sensor that the transducer has been abraded. Look out for the transducer status in the green Status box – this will tell you if your sensor needs abrading.
⚡ If the sensor is configured with an interval delay, it will require a Wake to re-enable communication.
Reboot command
⚡ If the sensor is configured with an interval delay, it will require a Wake to re-enable communication.
Wake command
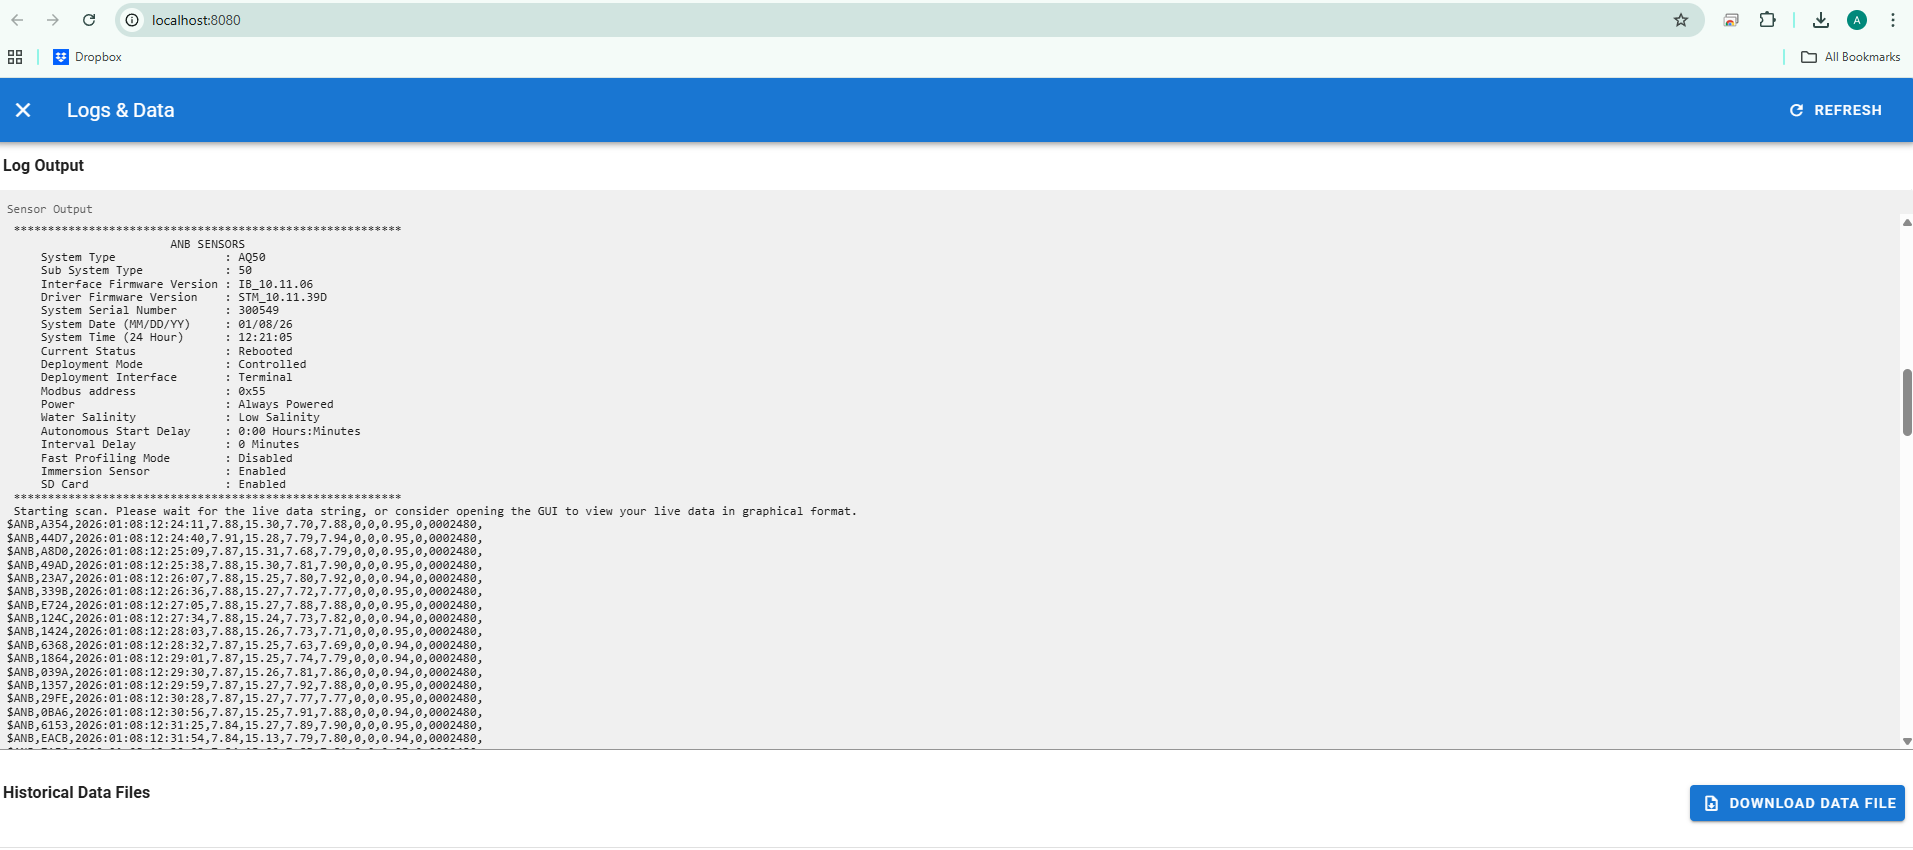
Log output
GUI settings
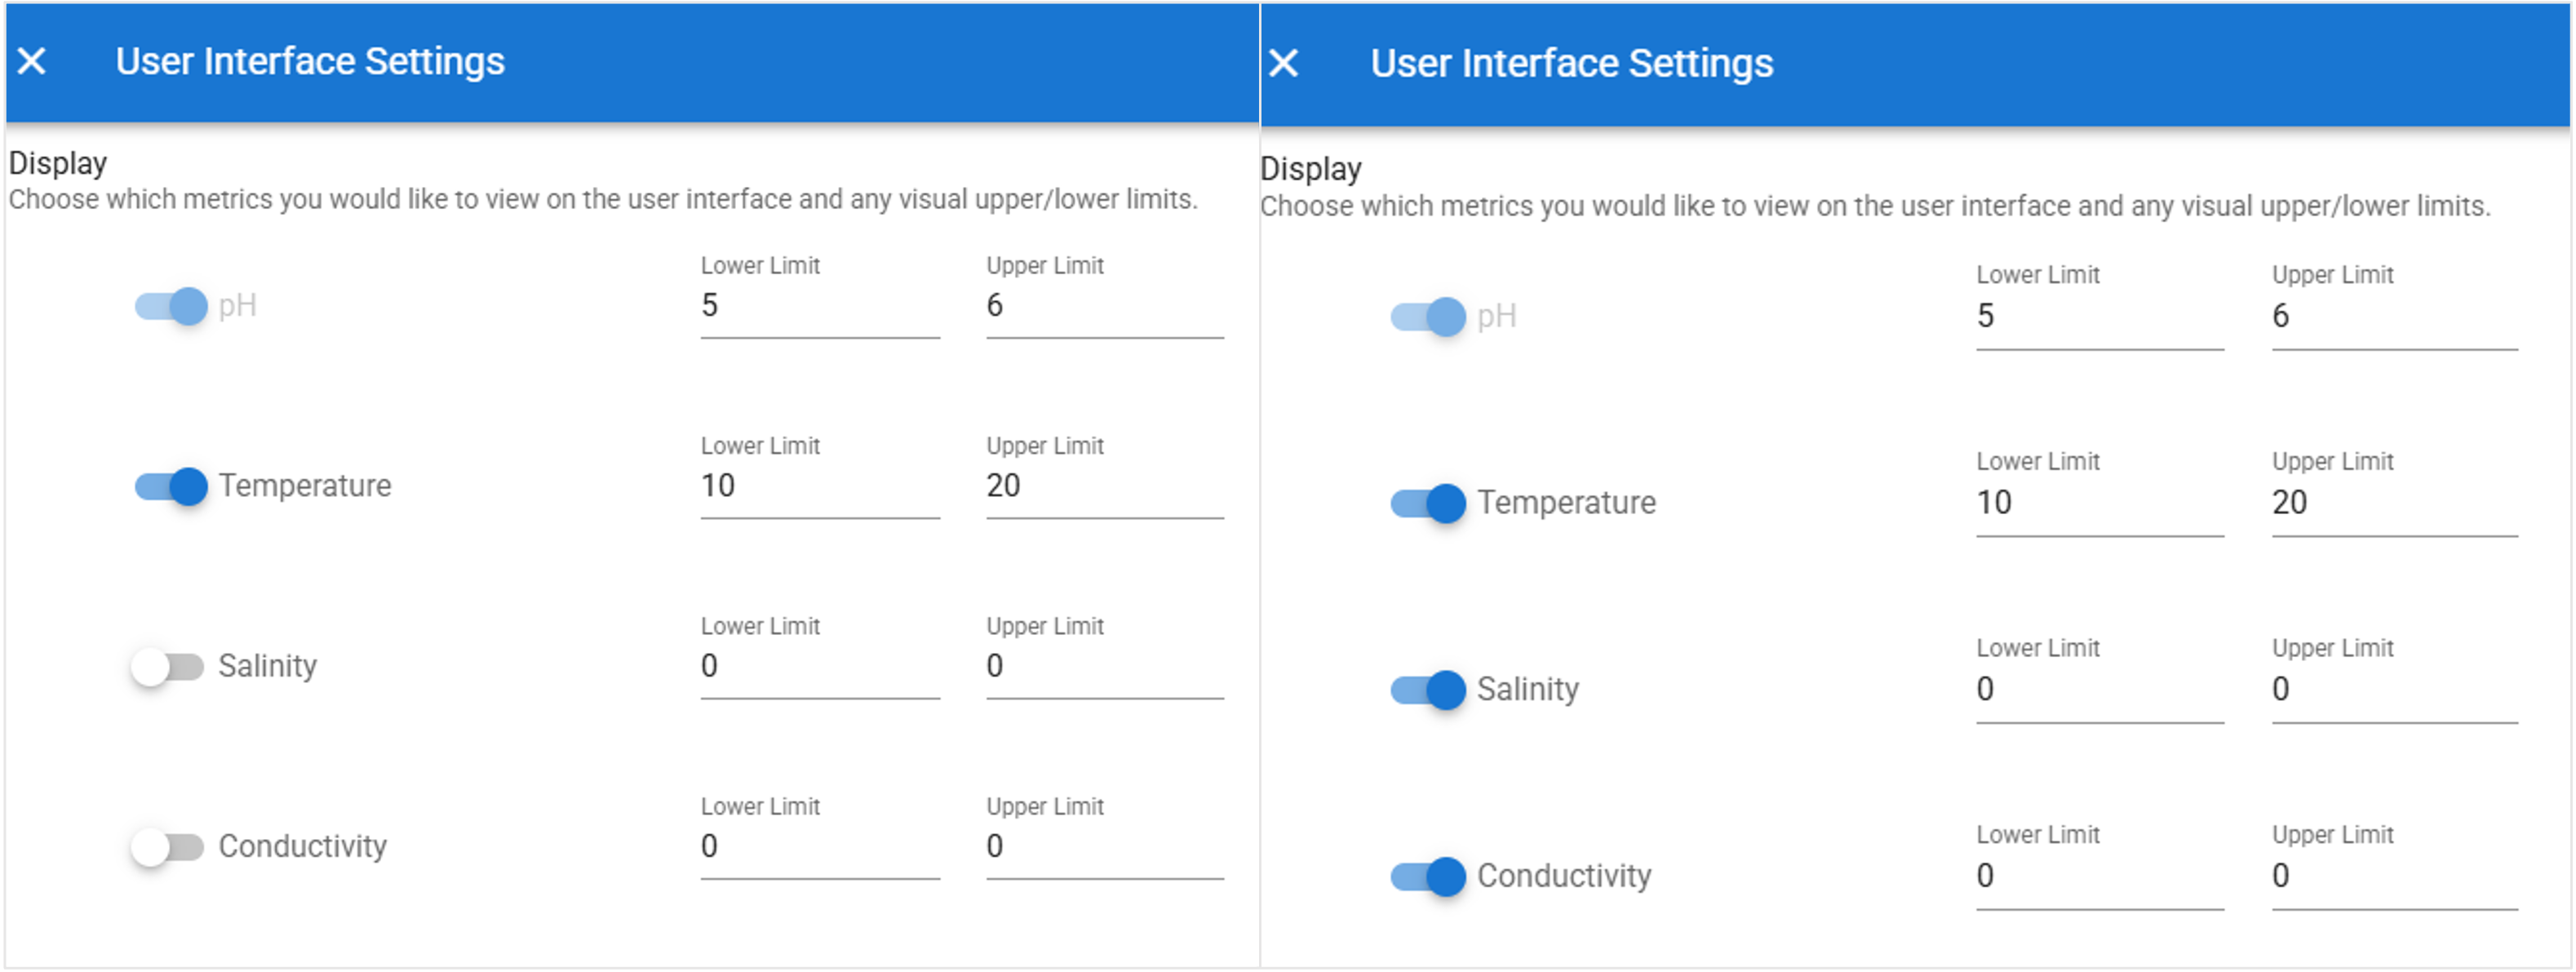
After changing the GUI Settings, please refresh the browser to reset the graphs.
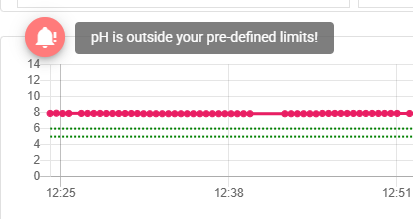
The limits set will show as green lines on the graph, and the alert button will appear if your data is outside them.
There are two buttons next to the charts that let you zoom in on the data and enlarge the graphs for better visibility.

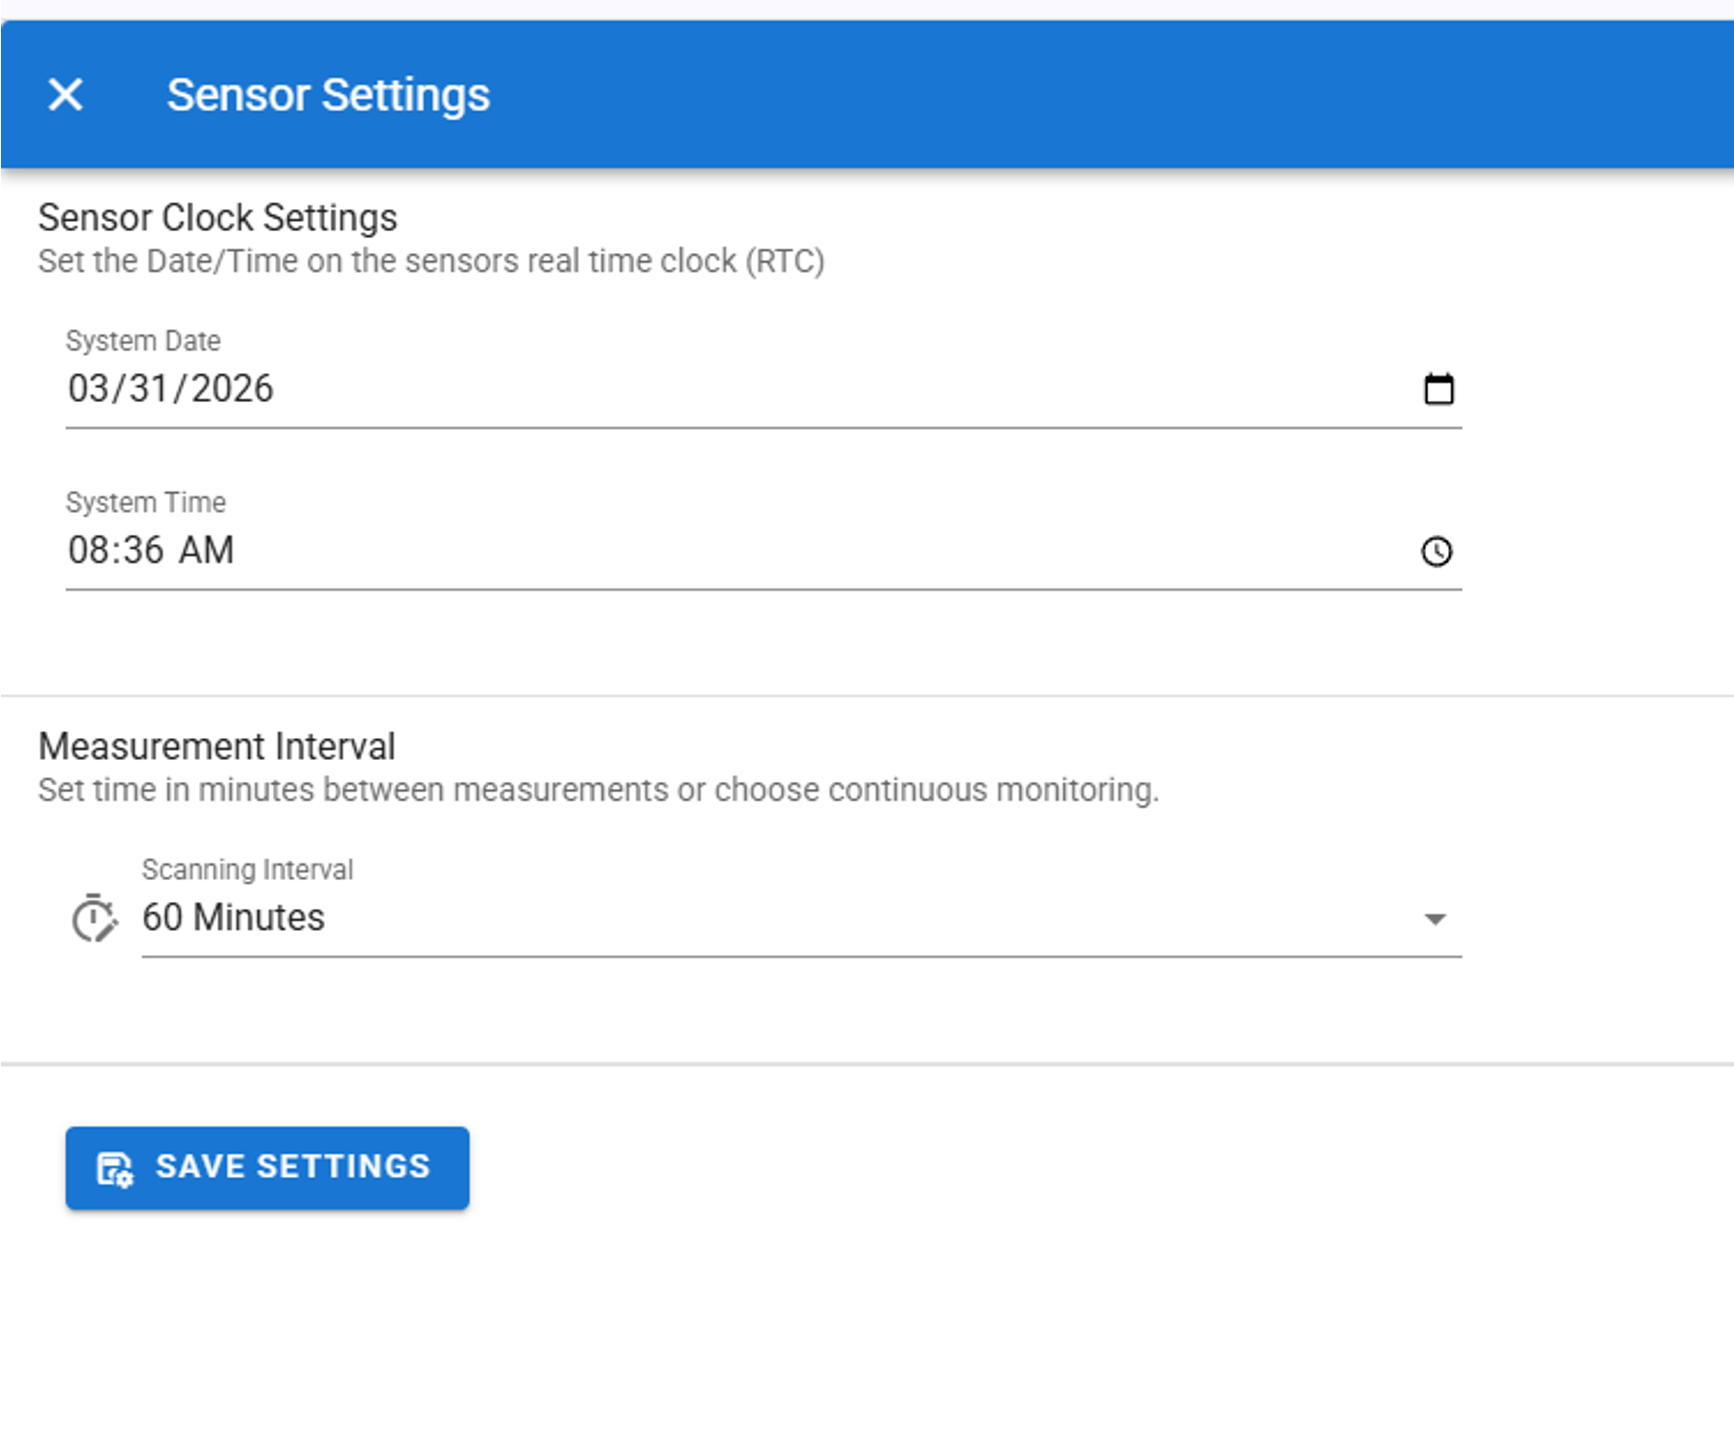
Sensor settings
This allows you to simply change the date/time and the measurement interval time
Ensure you save settings after changing them